|
This small and quick tutorial will guide you through the basic steps needed to create your first
business card with Business Card Studio. Final steps include its printing.
1. Launch Business Card Studio by clicking on the appropriate shortcut on your desktop (or start BusinessCard.exe either).
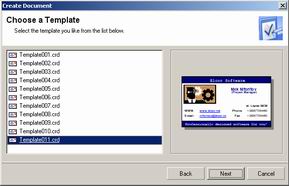
2. Press File->New (Ctrl+N) to invoke wizard dialog.
3. Select Create Project from a Template and choose the template you like in the left part of the window (use Up, Down arrow keys to switch between templates).
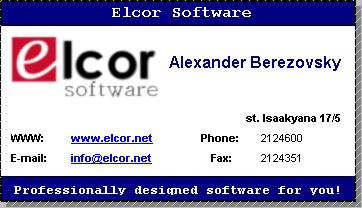
4. Now you should enter your personal information like name, phone and/or fax number, address, company's logo etc. When you're done press Save profile button. Click Next.

5. Press Finish. Now it's done and you should see the result. You'll probably have to correct position of some objects. It's easily done by dragging them to a desired place.
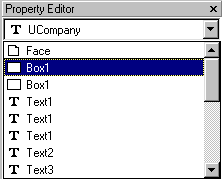
6. Now let's change color of upper and bottom boxes. For this locate the Property Editor window to the right of your card's image. Select Box1 from the drop-down objects list. Usually you can select objects by simply marking them in your drawing region, but in cases when the desired object is not the topmost one it's easier to locate it using the method described above.
7. In the same Property Editor window find Brush Properties groupbox and switch current filling type from Color to Gradient. Choose Silver color in the color from list.
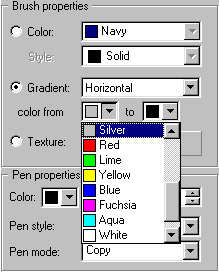
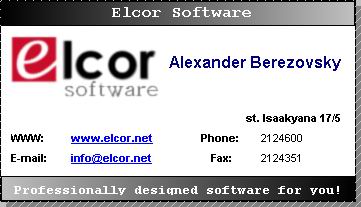
8. Repeat step 7 for another Box1 object. This time you may swap from and to gradient colors to obtain a better effect. Finally we get smth like this:
9. Press File->Save (Ctrl+S) to save the result.
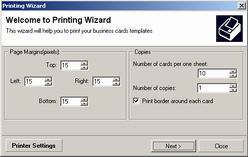
10. Now if you want to print your cards simply go to File->Print menu. The Printing Wizard dialog will popup. Here you may set number of cards per sheet, number of copies, all margins and other printer's settings.
11. Press Start Wizard button. You'll be presented wth preview of a sheet with specified number of cards on it. If you're satisfied with preview simply press printer icon ( ) to start printing. ) to start printing.

|